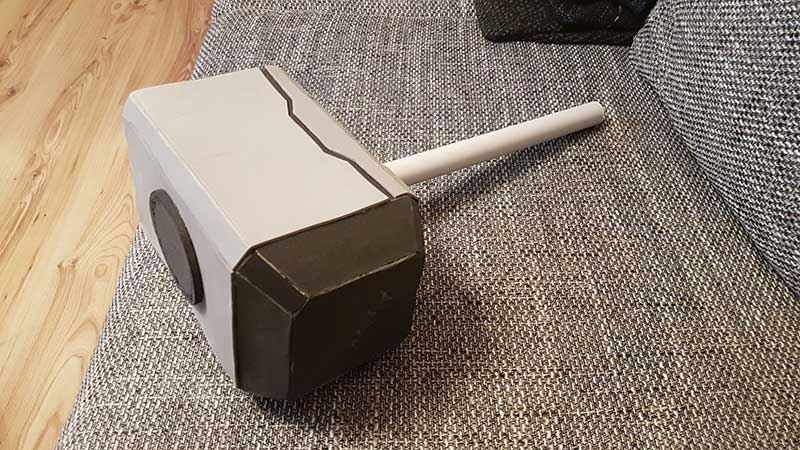
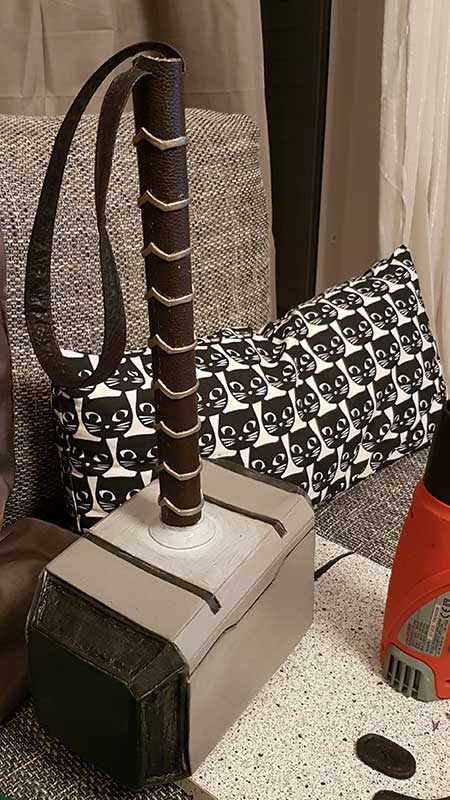
Mjolnir – Thors magic hammer – might be one of the most iconic movie props ever! While creating the Thor cosplay for Marcel I really was afraid the most that I could not manage to create a proper version of Mjolnir. I never created a prop like this before, so this was a lot try and error and learning more about foamsmithing. Using craft foam or especially Profoam, a german version of EVA was crucial, because conventions in Germany have very strict regulations for props and if you do not want to discuss at the weapons check a foam prop is always a good choice. So buying the official Marvel Mjolnir would have been an option, but just for photoshootings. So here we go, lets create a foam prop Mjolnir!
Mjolnir hammer head
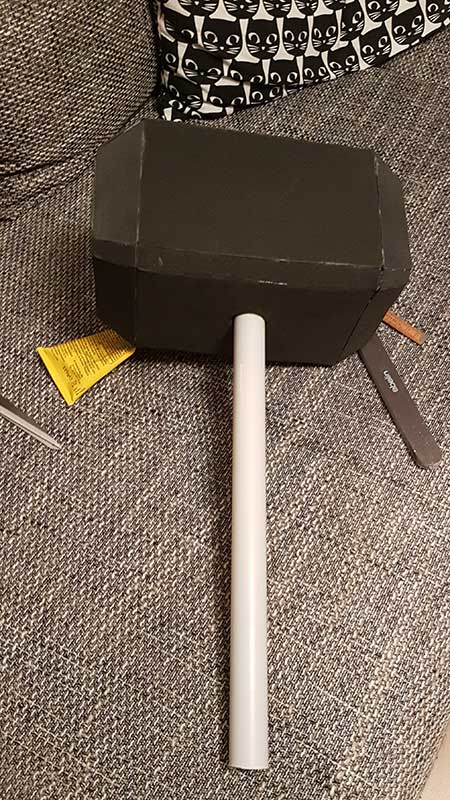
I made the base for Mjolnir from Profoam H in 5mm from Craftperium. To get the dimenstions right I googled the measurements and checked out Pepakura-Files for the basic shape. For the handle I just took a pvc pipe. I glued it on the top and the whole with pattex – but later it turned out this won’t be enough to fix the handle. If I’d make another Mjolnir I’d fill the hammer head with building foam before I add the side caps to give it more fixation.
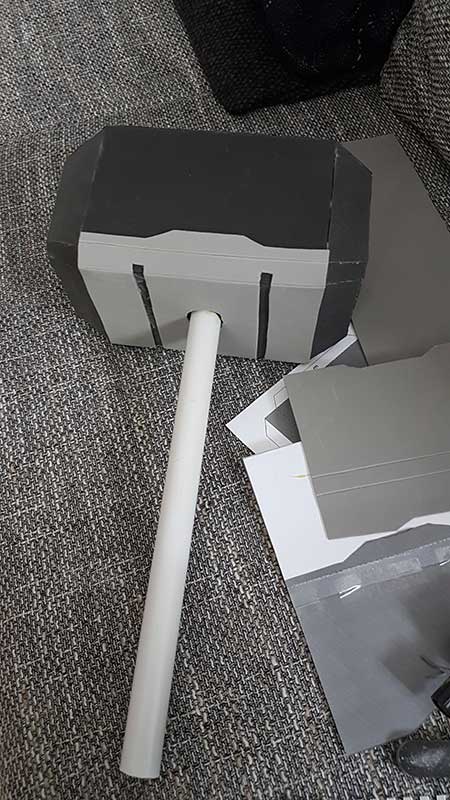
To get the layered shape of the hammer head I then took 2 mm craft foam and added the top layer. I found it useful to cut the lines on the edges carefully in the craft foam, to the lines look more clean.
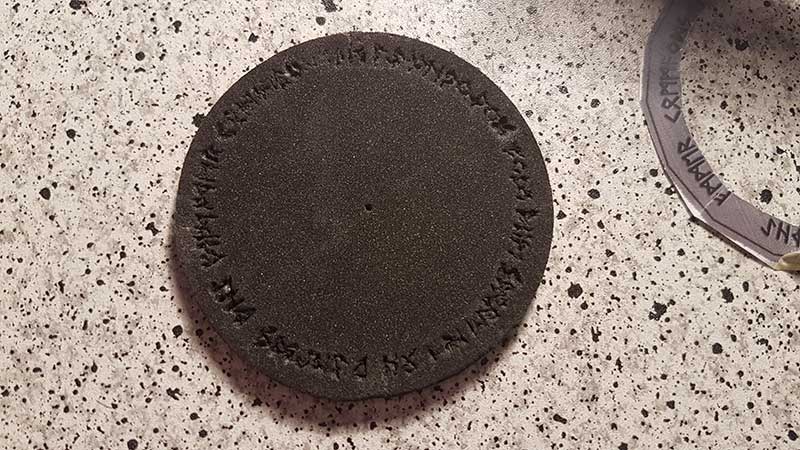
First detail nightmare was the the cap on the hammerhead with the Runes that say: “He who wields this hammer commands the lightning and the storm” – actually the Profoam has a very high density and I was able just to cut the runes in the foam with a scalpell. I also tried also to use a soldiering iron, but at leas the ones I have made too thick lines, so I went back to the cutting. It took me 3 attempts to carve the runes in, but then I liked it finally.
So here we go a basic Mjolnir out of foam – the God of Thunder would be proud! I then primed everything with woodglue – actually a bit early because I forgot something very important: The side cap details – Frankly I really hesitated some time to even start on workin on Mjolnir, because I was afraid I wouldn’t be able to create this in a worthy way. But I found a way (hope so!):
Mjolnir engravings
The engravings on the side caps of Mjolnir gave me major headaches first. Building a foam prop I wanted them to be from foam because other material would be to heavy probably. I thought first about making a mold and try to cast the pieces because the would have been 8 pieces of the same pattern, but I thought the combination of heavier and light layers could be a problem with glueing and later priming and painting. So the only option I had was: Pushing in the pattern in the foam.
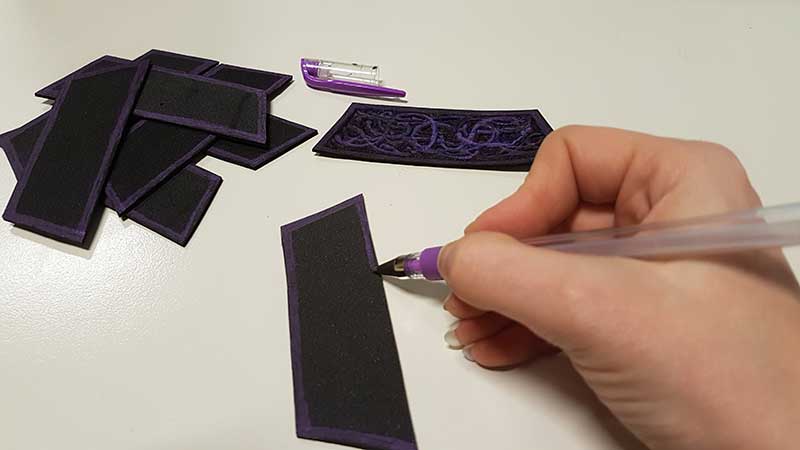
First I took 2mm craftfoam and hand painted the details on every piece with a gel marker. The pattern needed to be higher later to look like engravings, so I took a pen and pushed everything around the lines of the pattern down. You need to have a proper pressure to keep the foam flat and it turned out after 2, 3 pieces my hand hurt and I needed to make a break. Frankly I also used this as a reason for procrastinating on this part of the prop – hahaha.
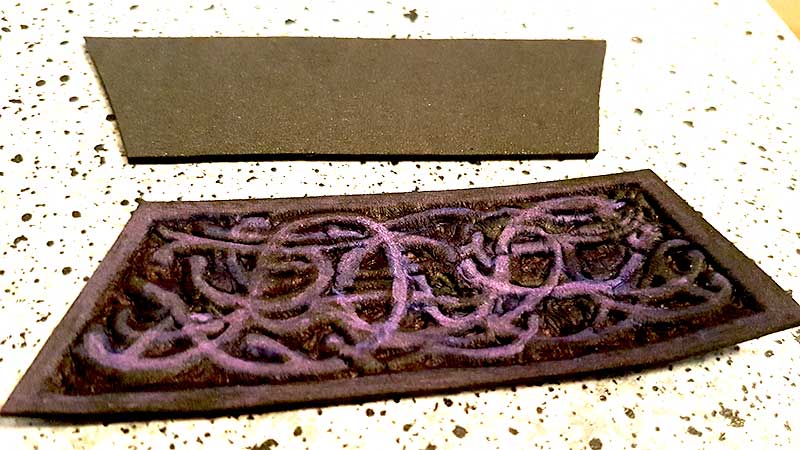
Having 8 of this little bastards done I used a soldiering iron to burn a in the side caps – actually I don’t know if it was very wise to burn the immersions, because the iron got too hot fast and it got not really even. I didn’t like the outcome at first, but I reworked the lines so long with the soldiering iron till I liked it and the pattern pieces could be glued on the hammer head. On this picture you see the stages of procrastination 😀 I finished quite everything else on Mjolnir before this parts were finished, because it was really annoying to create the penals. What you see here also is that I sanded them also a bit to get a clean surface before covering everything with heaps of woodglue to prime Mjolnir.
Mjolnir handle details
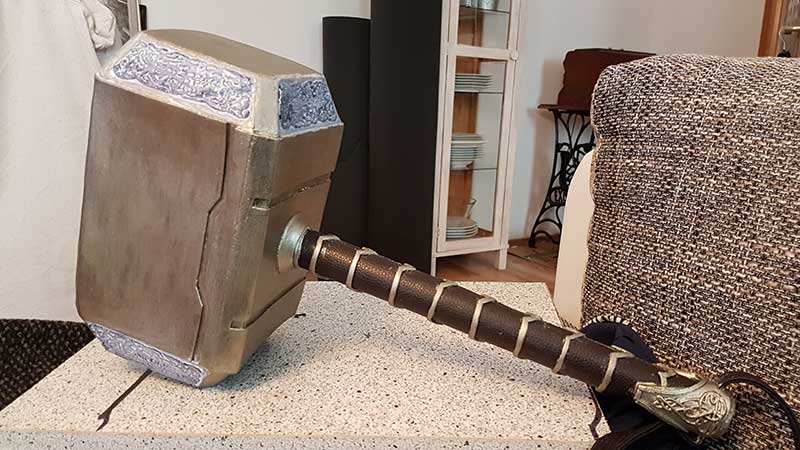
I wrote alreay an article about how to craft details on foam, so I link over there, check out my blog entry “Thor Cosplay Mjolnir and Armor Detail“. But to have a short summary here, too – this is what I did: First I covered the handle with brown pleather. After the pleather part I added the little disc under hammer head. To achieve the bending it is useful to cut the inner circle of the disc a bit smaller than the handle diameter. So the foam is forced to stretch a bit while you put it on the handle and you get the proper shape.
Here you also see I cut two slits in the handle on opposite sides to stick the strap through it. I used a strap from a vintage purse I found on a flew market years ago. I pulled the loose ends on the inside of the pvc pipe and outside the handle I handsewed the loose ends together and pushed back the seam in the pipe. So the seam is hidden and the strap is ready for some proper hammer swirling!
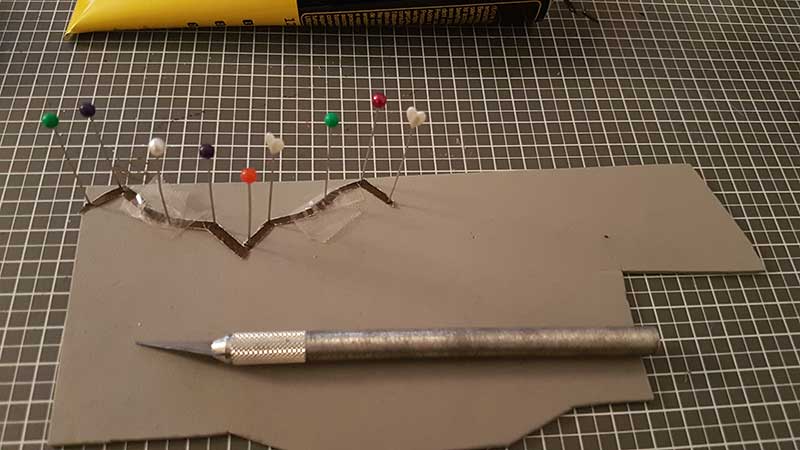
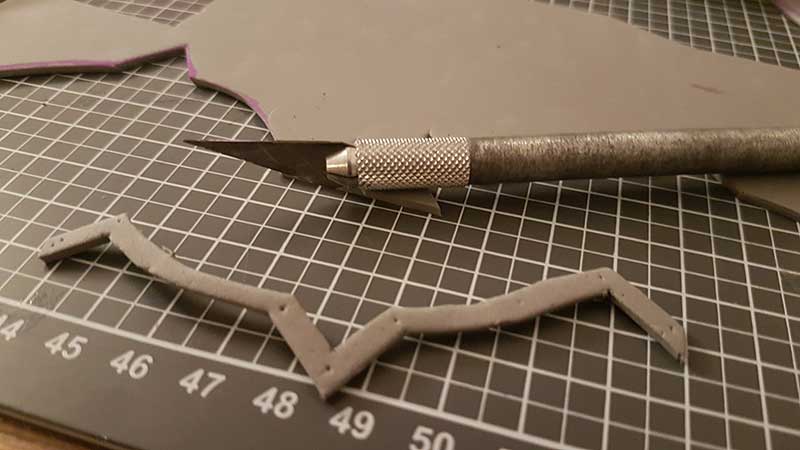
Also you see on this pic I added the silver lines! I made them also out of 2 mm craft foam. I cut them with a scalpel and a stencil I pinned on the foam with a lot of needles. After glueing the foam on the handle of Mjolnir I primed the foam stripes with wood glue before painting them in silver. It is necessary to do this after glueing the foam on the pleather, because the woodglue will create a hard surface, so you can’t bend the foam anymore after priming without breaking the surface. So take a tiny brush, a glass of wine and have a bunch of q-tips ready to clean the pleather up.
It really works so well, you just need patience for a year and calm hands 😀 The little wholes from the needles dissappear with priming with woodglue and painting.

The final step for finishing Mjolnirs handle was the cap on the end. The lower detail part on the handle was a bit more challenging. I first tried it with worbla but then decided to go also for foam as I would have needed to heat the worbla on the handle and was afraid to destroy other parts. I decided to make two halfs of the cap and add them around the handle. For the lines again I used my technique to pin and glue yarn in the shape I want. This time I used a thicker waxed yarn. It took some more needles and layers of wood glue, but in the end it was fix.
Molnir prop painting

After priming everything with woodglue I painted the Molnir hammer head with a mix of Lascaux aluminium silver and black acrylic colours from Craftperium. The details on the side caps got another black layer before I painted everything again with silver – this supports the engraving look. In the end I added some rusty, dirty details for a proper battle used look with dry brushing and different shades of brown, red (fewwww red!) and black acrylics.

It was really hard for me to hand this baby to my boyfriend after hours and hours and hours of detail work – I’m happy to hold, wield or cuddling Mjolnir for me at home – or: when nobody watches 😀 But every time Marcel takes this hammer in his hands I’m such a proud costumer seeing my prince of Asgard with this outfit rocking his Thor cosplay! For more Thor-some photos and progress also check out his Instagram The rising Thor!

If you want to create your own foam prop or even a Mjolnir, too I’m happy to help and answer questions! Just hit me a comment here, and if my tutorial helps you to create something, please send me pics <3
Enjoy the fun in cosplay xoxoxo